📹 How To Re-Authorize Your Facebook Permissions
If your Facebook Page or Group is experiencing errors, you may need to
re-authorize access with SmarterQueue. This is a standard procedure and
easy with our simple guide below 👾
Why Do I Need To Re-Authorize Permissions?
You may need to re-authorize your Greatly Social permissions if you're experiencing any of the following issues:
- Greatly Social isn’t displaying your Facebook Group or Page when trying to connect a Profile
- Greatly Social isn't displaying your Instagram Profile when trying to connect a Profile
- Greatly Social isn't displaying your Facebook Page when trying to add it to Inbox
- Your Facebook posts are not being published
- Your Facebook Page/Group keeps getting disconnected
Why is the re-authorization required?
- You may have inadvertently removed permission that Greatly Social requires while editing other permissions in Facebook
- If you recently added a new Page or Group to your Facebook Profile, you may need to re-authorize permissions so that your new Page has the same Greatly Social permissions as the Pages that already exist
- Facebook sometimes invalidates your permissions token for security reasons (e.g. if you change your Facebook password), so you will have to re-connect Greatly Social to get a new permission token
How To Re-Authorize Your Facebook Permissions
To re-authorize your Facebook Permissions, you need to access Business Integrations (also by following the steps below).
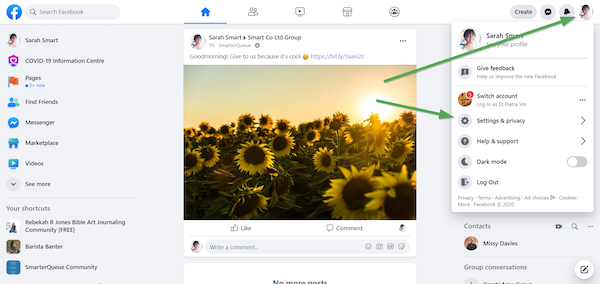
1. On the Facebook website, Navigate to 'Settings & privacy'
2. Then continue to 'Settings' > ' Business Integrations'
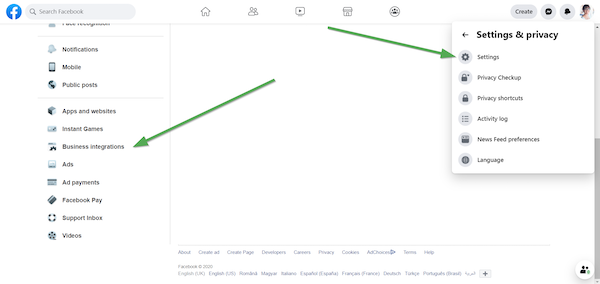
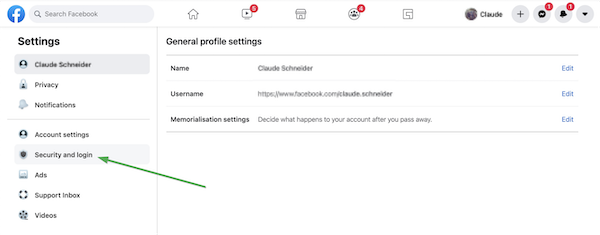
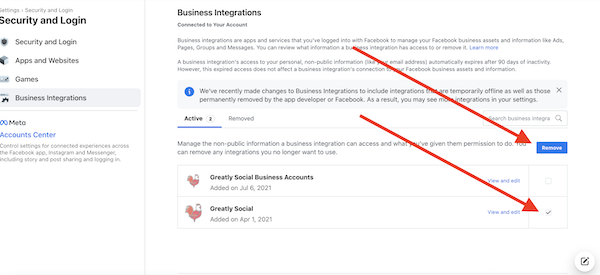
Note: We've noticed that for some Facebook accounts Business Integrations doesn't come up here. If you find yourself in the same situation, click on 'Security and login' first:
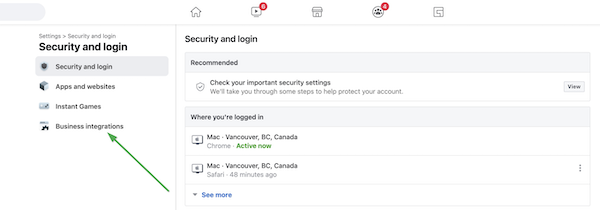
You'll be able to find Business Integrations here instead:
3. Once you've reached Business Integration, find the Greatly Social App, use the check-box to select it, then click the blue Remove button.
Note: If you don't see the SmarterQueue App here, you may find it in "Apps and websites".

This will be the case if you've only ever connected a Facebook Group, and not a Facebook Page or Instagram Profile
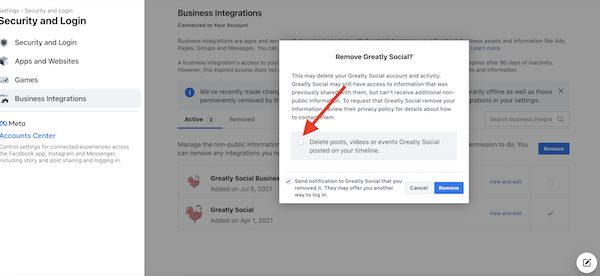
4. After clicking 'Remove', you'll see a pop-up asking if you'd also like to “delete all posts, photos, and videos on Facebook that Greatly Social may have posted on your behalf." It is very important to leave this unchecked unless you really do want to delete any posts that have been published to Facebook via Greatly Social
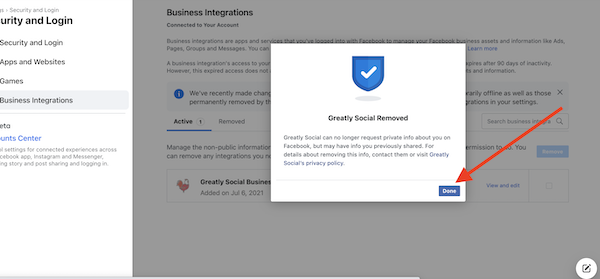
5. You'll see a final confirmation pop-up stating that Greatly Social has been removed. Click 'Done' .
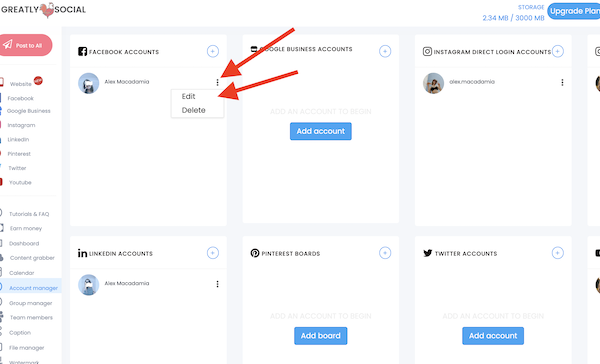
6. Navigate back to the Greatly Social website inside your browser and go to the Account Manager page.
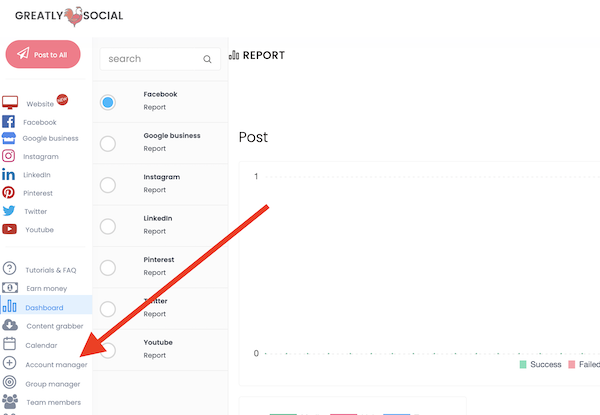
7.
Under the Facebook Accounts section, click three dots (...) to the
right of your Facebook account, then you will see an "Edit" option.
Click "Edit."
8. You’ll be redirected back to the Facebook website and see a dialogue
box pop up where you can then click to ‘Continue as’ your Facebook
Profile
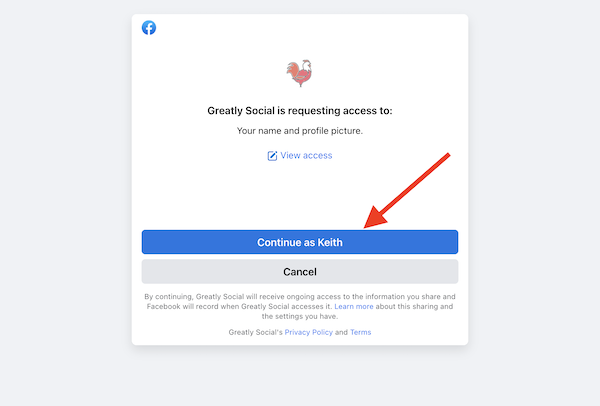
Important Note: This pop-up is to confirm that you're logged in as the right user! Rest assured, this does not give Greatly Social permission to manage your Personal Facebook Profile in any way.